Dreamweaver tutorial: Learn an Introduction to Styles in Dreamweaver
What you’ll learn in this Dreamweaver Tutorial:
|
This tutorial provides you with a foundation for working with the Adobe Dreamweaver workspace. It is the third lesson in the Adobe Dreamweaver CC Digital Classroom book. For more Adobe Dreamweaver training options, visit AGI’s Dreamweaver Classes. |
Adobe Dreamweaver Tutorial: An Introduction to Styles in Dreamweaver
You have styled the first element on your page by first formatting the text as a Heading 1 in HTML, and then you changed the font and color using CSS. It’s important to realize that every change you make in the Design view creates or modifies the code. In the next exercise, you’ll begin to explore the HTML and CSS code behind the Design view. To help put this exercise in context, a little background on HTML and CSS is in order.
The HTML language has been around since the dawn of the Web. It’s easiest to think of HTML as the structure behind the pages that are rendered in your web browser. An HTML page at its most basic is a collection of text, images, and sometimes multimedia such as Flash or video files. The different sections of a web page, such as a paragraph, a heading, or a list, are all elements.
CSS is also a language, but it has not been around as long as HTML. In many ways, CSS was created in order to allow HTML to do what it does best: create the structure of a page, but not style. CSS is a simple language that works in combination with HTML to apply style to the content in web pages, such as text, images, tables, and form elements. CSS uses rules, or style instructions, that the HTML elements on your page follow. The most important thing to remember is that HTML and CSS are two separate languages, but they are very closely aligned and work together very well.
In the last exercise, you were introduced to this interplay between HTML and CSS. There was an HTML element for the Heading 1 formatting. In the code it looks like this:
<h1>OrganicUtopia Events</h1>
That was the HTML element. The CSS rule that defines the appearance of the <h1> element looks like this:
h1 {
Gotham, “Helvetica Neue”, Helvetica, Arial, sans-serif;
color: #9C3;
}
CSS has a different syntax than HTML. In HTML, tags are defined by angled brackets, and you have opening tags, <h1>, and closing tags, </h1>. In CSS code, you are not working with tags at all, instead you use selectors. In the CSS code above, the h1 is referred to as the selector because it is selecting the HTML element and then declaring some rules for its appearance. Because you’ve established that HTML and CSS are two separate languages and have different syntax, it’s important that you see where this code lives in your web page. You will do this by changing Dreamweaver’s workspace.
This exercise is intended to help you understand the relationship between HTML and CSS code that is created in Dreamweaver, and is not necessarily the way you will always work in the program. Many people will work in the Design view most of the time, but the Split view you are about to use is very helpful for learning the languages of HTML and CSS.
1 Click the Split button in the Document toolbar at the top of your page to open up the Split view. The Split view allows you to see your code and the design of your page simultaneously.
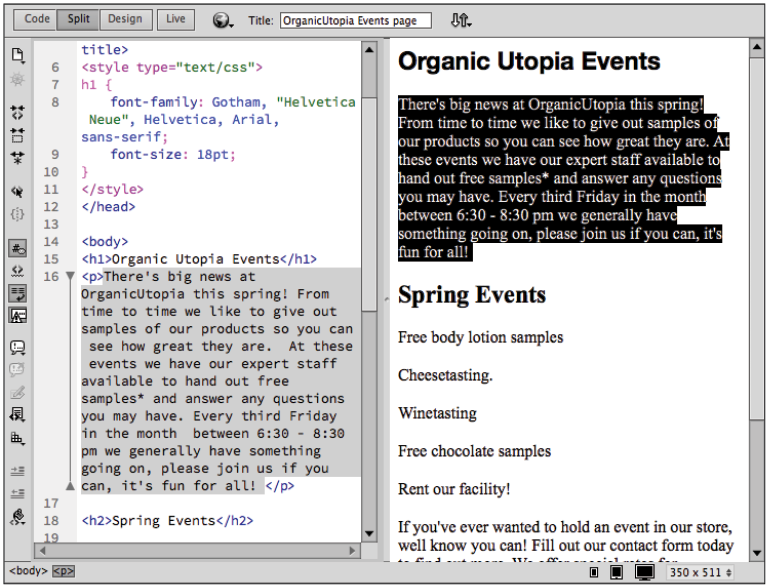
2 Click quickly three times in the paragraph beneath OrganicUtopia Events in the Design view. In the Code view the text is highlighted between the opening and closing paragraph tags. As noted above, this is referred to as the paragraph element.
|
A paragraph highlighted in the Split view. |
You will now change the font size of your paragraphs.
3 Click <style> in the Sources menu to alert Dreamweaver that you want to add another embedded style. Click the Add Selector button in the Selectors menu to create a new CSS style for our p element.
4 In this case, Dreamweaver has recognized that you have selected text in a paragraph within the body tag of your page so it prefills the text box with body p. Select the body and delete it leaving the letter p to create a selector for our paragraph. Then press Enter (Windows) or Return (Mac OS).
5 If necessary, clear the Show Set check box on the Navigation Bar in the Properties pane of the CSS Designer panel to show all the available CSS properties. Click the Text button In the Properties menu to limit the choices and only show the text-related properties.
In this case, the font size is set to 18 pixels. Now let’s look at the CSS code that is defining this font size.
6 Locate the font-size property in the Properties pane of the CSS Designer and click medium to the right of the property label. Select px from the menu and enter the number 18 in the text box that appears. Press Enter (Windows) or Return (Mac OS) to apply the change.
7 Within the Code view of the split screen is all the HTML and CSS code that defines the appearance of this page. On the right side of the Code view, scroll up by clicking the up arrow or by clicking the scroll bar and dragging upward. Toward the top of the page, you are looking for a few lines of code that look like this:
<style type="text/css">
h1 {
font-family: Gotham, “Helvetica Neue”, Helvetica, Arial, sans-serif;
color: #9C3;
}
p {
font-size:18px;
}
</style>
Between the two <style> tags are all the CSS rules you have created up to this point. Previously, you learned that CSS has a different syntax than HTML: because all the CSS rules are actually contained within an opening <style> tag and a closing </style> tag, they are allowed to have a different syntax. Additionally, the style tag itself is nested inside an opening and closing <head> tag. In the world of HTML, nothing contained within head tags is rendered on a web browser’s screen. You will explore this further in the next lesson, but this is referred to as an internal style sheet.
You will now see that changes made in Dreamweaver’s Code view apply to the Design view as well.
8 In the Code view, locate the line font-size:18px in the rule for p, and select the value 18 by clicking and dragging over it. Type 14 to change the value. Although you made a change in the Code view, it has not yet been automatically updated in your Design view. You need to refresh your page in order to see the changes occur in the Design view.
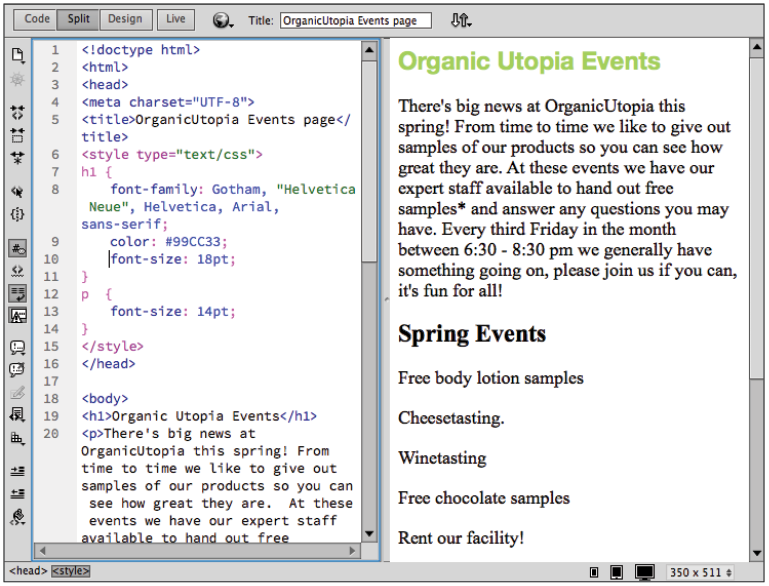
9 In the Property Inspector, click the Refresh button to apply the changes; your paragraph text becomes smaller.
|
Changes made in the Code view are reflected in the Design view after clicking the Refresh button. |
You can also click once inside the Design view for the page to refresh automatically. |
On the Web, font sizes are specified differently than they are in print. The numerical choices in the Size drop-down menu refer to pixels instead of points. Also, the xx-small through larger options could seem oddly generic if you are accustomed to the precision of print layout. Because web pages are displayed on a variety of monitors and browsers, relative measurements can be a useful way for designers to plan ahead for inevitable discrepancies in the rendering of pages.
10 Click inside the first paragraph in the Design view. You will now change the color of the paragraph slightly to a dark gray rather than the default pure black. Click the p selector in the Selectors pane of the CSS Designer panel so that we can modify the properties for our paragraph element.
11 If necessary, clear the Show Set check box on the Navigation Bar in the Properties pane of the CSS Designer panel to show all the available CSS properties. Click the Text button in the Properties menu to only show the text-related properties.
12 Locate the color property in the Properties pane of the CSS Designer and click the Set Color button to the right of the label color. When the Swatches panel appears, locate the dark gray swatch in the top-left corner of the palette, which is hexadecimal color #666. Click the swatch to apply the color. Notice that not only does the appearance in the Design view change, but in your Code view a new line of CSS has also been created (color: #666666).
Working in the Split view can be a great way to learn about hand-coding without diving in completely. Even if you’re not quite comfortable editing code, keeping an eye on the code that Dreamweaver writes for you can give you a better understanding of how things like CSS affect your web pages.
13 Click the Design view button to return to Design view.
14 Choose File > Save. Keep this file open for the next part of this lesson.
For more information about Cascading Style Sheets, see the Web Design with HTML and CSS Digital Classroom book available in electronic and print formats. |
Continue to the next Dreamweaver Tutorial: Previewing Pages in a Web Browser in Dreamweaver >