Illustrator tutorial: Template layers in Illustrator
What you’ll learn in this Illustrator Tutorial:
|
This tutorial provides you with a foundation for working with Adobe Illustrator templatelayers. It is the eighth lesson in the Adobe Illustrator CS6 Digital Classroom book. For more Adobe Illustrator training options, visit AGI’s Illustrator Classes. |
Adobe Illustrator Tutorial: Template layers in Illustrator
Template layers are locked, nonprinting layers that you can use to manually trace images. Template layers can come in handy when you want to trace a raster image by hand or you want to create artwork from the scan of a mock-up design. Template layers are dimmed so that you can easily see any paths you draw over the layer. When that illustration is placed in a layout application, like InDesign or QuarkXPress, the template layer does not show or print. Template layers can be created in two ways:
The most common way to create a template layer is upon import, while placing raster artwork into Illustrator as a template. Select File > Place. In the Place dialog box, select the artwork you want to import and select the Template check box in the lower-left corner; then press Place. The file is placed on a locked layer and is dimmed to 50 percent by default, so that you can clearly see any paths you draw over it.
The second way to create a template layer is to convert an existing artwork layer into a template. Double-click a layer name in the Layers panel. In the Layer Options dialog box that appears, select the Template check box and press OK. The layers icon in the Visibility column changes from the Visibility icon ( ) to a Template icon (
 ), and the layer is automatically locked. If you convert vector artwork to a template layer, it will not be dimmed.
|
Converting a layer to a template layer allows you to |
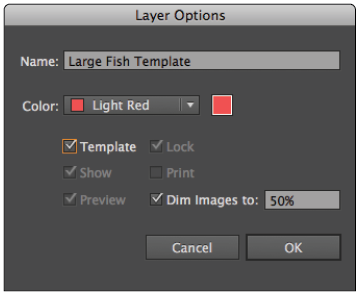
Try converting the Large Fish layer to a template layer and trace it manually, using any combination of the path and shape drawing tools.