Photoshop Elements Tutorial: Adding a layer style to type in Photoshop Elements
What you’ll learn in this Photoshop Elements Tutorial:
|
This tutorial provides you with a foundation for working with Adobe Photoshop Elements effects. It is the seventh lesson in the Adobe Photoshop Elements 10 Digital Classroom book. |
Photoshop Elements Tutorial: Adding a layer style to type in Photoshop Elements
Now that the text is placed on the book cover, you can apply a Layer Style effect to the text. The first thing you will notice is that when you apply a layer style, the text does not need to be simplified. This means that you can still edit the text after you apply a layer style.
1 Make sure the layer called The Mountain Called Life is still selected. In the Effects panel, press the Layer Styles button ( ), the second button from the left.
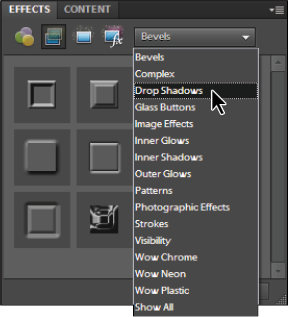
2 From the drop-down menu in the upper-right corner of the Effects panel, choose Drop Shadows.
|
Choosing the correct effect. |
3 Double-click the Soft Edge Drop Shadow effect to apply that effect to the selected type layer. Remember, hover your cursor over the icons, and text balloons will pop up with the name of the Layer Style. Notice that you didn’t have to simplify the layer to apply this kind of effect.
4 Choose File > Save, then File > Close to close the document.
 | If you want the names of the different effects to appear in the Effects panel with the icons, press the Effects panel menu button ( |
 ) in the upper-right corner of the Effects panel. In the resulting menu, choose the option Show Names.
|
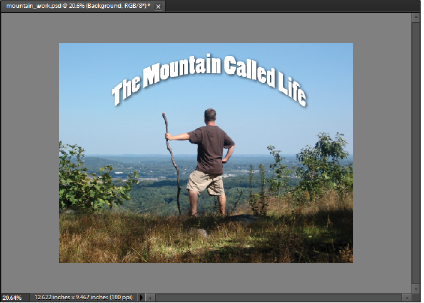
This is what the final photo book cover should look like. |
Creating an animation with text
In this exercise, you will learn how to save an animated gif that you could send someone as an e-card. You will create a file with two layers that you will then animate inside the Save for Web feature.
1 In the Organizer, locate and select the halloween.psd file. Press the arrow to the right of the Fix tab and choose Full Photo Edit from the drop-down menu to open the file in the Editor.
2 In order to save this file as an animated gif, you will need to change the file size, as it is currently far too big to use for the Web. Choose Image > Resize > Image Size. Make sure Constrain Proportions and Resample Image are checked at the bottom of the dialog box. First, change the resolution to 72, and then change the width in the pixel dimensions section to 800 pixels. Seventy-two pixels per inch is the proper resolution for the Web, and when you change the width, the height will automatically update because Constrain Proportions is checked. Press OK. Choose View >Actual Pixels to zoom in on the image. You may need to maximize the window to see the entire image by choosing View > Fit to screen.
|
Changing the image size. |

3 Select the Horizontal Type tool ( ), and click in the top left area of the image. Type Happy.
4 Highlight the type and change the font to Snap ITC or any other font of your choice if you do not have this font available on your computer.
5 Change the size to 60.
6 Align the text to the left.
7 Click the color box in the Options bar to make your own color. Choose R:193, G:111, B:14. Press OK.
8 Use the Move tool ( ) to position the text in the top left corner of the image.
| With the Type tool still active, you can move type by holding down the Control key and dragging, or by positioning the cursor just outside the text frame and dragging. |
9 Choose the Horizontal Type tool again, click in the lower-right of the image, and type Halloween.
10 Position the text in the lower-right corner of the frame.
|
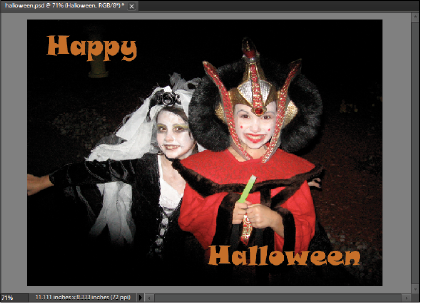
The image with two different text layers. |
Adding a stroke
Now that you have the two text layers created, you will apply an effect to the text’s stroke.
1 Select the Happy layer in the Layers panel.
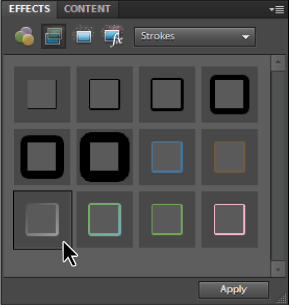
2 In the Effects panel, make sure Layer Styles are active, and choose Strokes from the drop-down menu.
3 Double-click on the Gradient Stroke Black & Gray effect.
4 Now choose the Halloween layer, and double-click on the Gradient Stroke Black & Gray effect.
|
Select the Gradient Stroke Black & Gray effect. |
Getting the layers ready for animating
When you save a gif using the Save For Web feature in Photoshop Elements, you can animate the layers. In the e-card animation you are making, you want one frame to say Happy and the next frame to say Halloween. In order to accomplish this task, you will need to have two layers with the appropriate text on each one.
1 Click the Background layer in the Layers panel to select it. From the Layers panel menu (), choose Duplicate Layer. When the Duplicate Layer dialog box appears, press OK to name the layer Background Copy.
| You now have all the pieces you’ll need to make the animation. The next step is to merge the layers together. |
2 Press the visibility icon ( ) next to the Happy and Background layer to hide them. Background Copy and Halloween are the only layers that are visible.
3 Make sure that one of the visible layers is selected in the Layers panel, and press the Layers panel menu button ( ) and choose Merge Visible. Both layers merge into the Background Copy layer.
4 Press the visibility icon next to the Background Copy layer to hide it and next to the Background and Happy layers to make them visible.
5 Select the Happy layer and choose Merge Visible from the Layers panel menu.
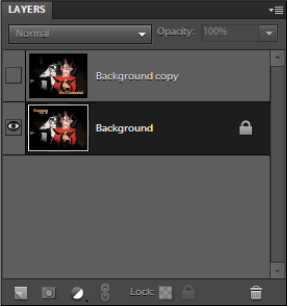
|
This is what the layers should look like. |
Time to animate
You can animate layers in the Save for Web dialog box when you choose GIF as the format.
1 Choose File > Save For Web.
2 In the Preset section, choose GIF 128 Dithered from the drop-down menu.
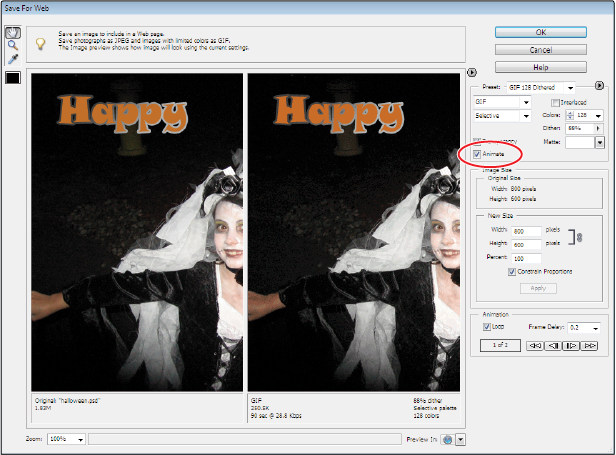
3 Check Animate at the bottom of the Presets section.
|
Make sure to check the Animate option. |
4 In the Animation section, make sure Loop is checked.
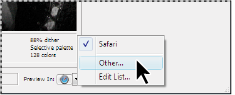
5 To preview the animation, click the arrow to the right of the Preview In icon at the bottom of the Save for Web dialog box. Choose Other, then navigate to a browser application on your computer and press Open. That browser now appears as the Preview In icon. Click the icon to preview the animation in your browser of choice. Close the browser and return to the Save for web dialog.
|
Setting a browser to preview your animation. |
6 Press OK to save the image. For Save As Type, make sure Images Only (.gif) is chosen. Press Save.
7 Open the image in your favorite browser to preview the image. If you would rather have a longer wait between frames, go back to the Save For Web dialog box and change the frame delay. Choose File > Save to save the file. In the Save As dialog, name the file Halloween_working and choose Photoshop from the format drop-down menu.
To send the saved .gif file in an e-mail message, simply add the give file as an attachment and send to whomever you wish.