Photoshop Elements Tutorial: Making Photoshop Elements Creations in Photoshop Elements
What you’ll learn in this Photoshop Elements Tutorial:
|
This tutorial provides you with a foundation for working with Adobe Photoshop Elements creations. It is the tenth lesson in the Adobe Photoshop Elements 10 Digital Classroom book. |
Photoshop Elements Tutorial: Making Photoshop Elements Creations in Photoshop Elements
Photoshop Elements offers a variety of ways to enhance and share your photos with others. Slide shows, photo books, calendars, and collages can easily be created.
Starting up
Within the Photoshop Elements Organizer: You will work with several files from the Lessons folder in this lesson. Make sure that you have downloaded the Lessons folder onto your hard–drive. In order to access these files in the Organizer, you need to import them. See “Adding files and folders to the Organizer” located in Lesson 1.
Within the Photoshop Elements Editor: The Photoshop Elements Editor defaults to the last panel layout that you used. Before starting, make sure your tools and panels are consistent with the examples presented in these lessons by resetting the panels. Do this by choosing Window > Reset Panels or by pressing the Reset panels button ( ) in the Options bar.
Creating a panorama
If you have photos of a wide scene, like a landscape, you can join them together into a single image. In the next exercise, you’ll use a series of four incremental photos of a river running through farmland. The strong, distinctive lines that are running through the pictures make this a good candidate for creating a panorama.
1 In the Organizer, type farmland in the Search text field to display the four images that you’ll use to create the panorama. Select all four images by clicking on the first image, then Shift+clicking on the last image and choose File > New > Photomerge Panorama. All four images are opened in the Photoshop Elements Editor and the Photomerge dialog box appears.
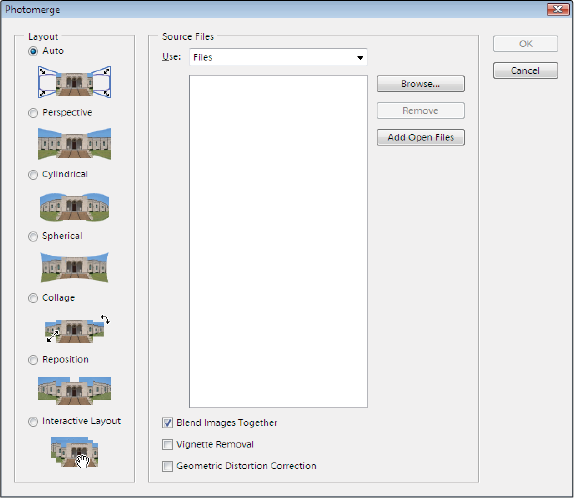
2 In the Photomerge dialog box, leave Auto chosen in the Layout section to allow Photomerge to determine the best layout method based on the analysis it performs of the images during the Photomerge process. Leave Files chosen in the Use drop-down menu and click the Add Open Files button to add the open files in the Editor to the list of files in the Photomerge dialog box.
|
The Photomerge dialog box. |
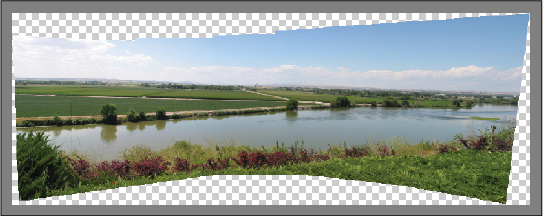
3 Press OK and wait while Photoshop Elements opens and closes windows to create your panorama. The panorama is a new document with four layers arranged to align the different images. The number of layers depends on the number of individual images you used in the Photomerge process. Each image is converted into its own layer, and any areas that are extraneous—the ones that aren’t needed to produce a completed panorama—are masked out and hidden using a layer mask for maximum flexibility if editing is needed.
|
The Photomerge process always creates an excess background area that must be cropped. |
4 When Photoshop Elements is finished processing the image, a dialog box appears asking if you’d like to fill in the edges of your panorama. Click Yes. This feature utilizes the new content-aware technology that can fill in areas intelligently by analyzing surrounding pixels to create a seamless transition between existing pixel information and new pixel information.
|
The panorama after allowing Photomerge to fill in the edge pixels. |
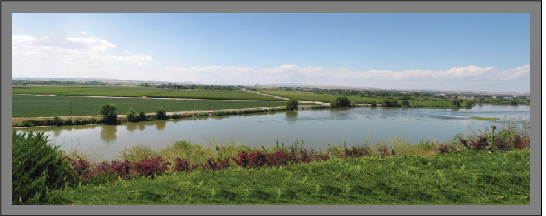
As you can see, the content-aware technology built into Photoshop Elements 10 does an amazing job of filling in areas in a realistic way. Although it did a great job in the sky area, the grass contains some repeat patterns that causes the foreground to look unrealistic. You’ll crop that out in the next step.
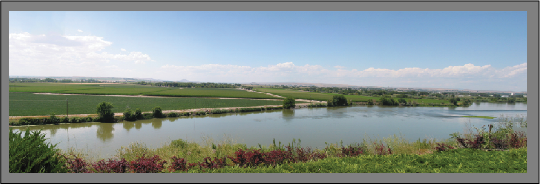
5 Select the Crop tool ( ) from the Toolbox and draw a marquee around the image to crop out some of the foreground area. Crop out as much of the bottom of the image as needed in order to remove the majority of the repeat pattern created by the filling of the edge pixels.
6 Click the green checkmark at the bottom of the crop window to finalize the crop.
|
The final cropped panorama. |
7 Select File > Save. Name the file My Panorama, and confirm that Photoshop is set as the file type, that the Lessons folder is the location, and that the Include in the Elements Organizer checkbox is enabled. Press Save.
8 Choose File > Close All to close the panorama and all four of the original Farmland images.
Creating a slide show
A slide show is fun to build. It allows you to combine images, music, narration, and text to create a unique multimedia display. Like most photo creations in Photoshop Elements, slide shows can be created from the Organizer, or the Editor. The easiest place to create them is the Organizer, as you will discover in the following steps. Note that the Slideshow feature is only available in the Windows version of Photoshop Elements. If you are using Photoshop Elements on the Mac OS platform, skip to the Creating a Photo Calendar section.
1 If it isn’t already open, launch the Photoshop Elements Organizer.
2 In the Organizer, type img in the search box. All the images that you will use in the slide show have the word img in the title. This is a great way to isolate them in the Organizer window.
|
The search field is a good way to filter images. |
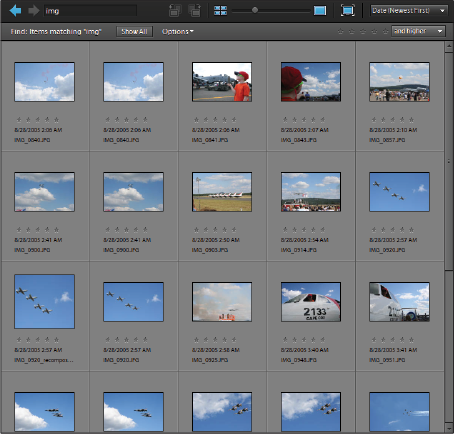
 | If you adjust the thumbnail size slider at the top of the Organizer workspace to make each image thumbnail smaller, you can display all 20 images on the screen at once. Note that if you’ve performed some of the previous lessons in this book, you may have more than 20 images. |
3 Click the first file in the window, then hold down the Shift key and click on the last file in the window. This selects all images at once. You can also select all the images currently displayed in the Photo Browser by using the keyboard shortcut, Ctrl+A (Windows) or Command+A (Mac OS).
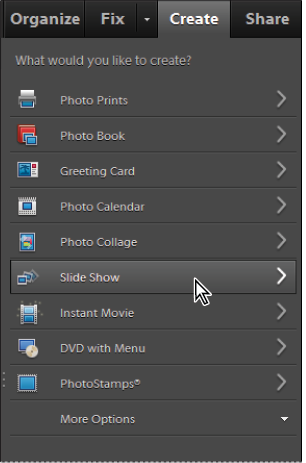
4 Select the Create tab on the right, and press Slide Show. Because images were selected when you created the slide show, they are automatically included.
|
Press the Slide Show button in the Create tab. |
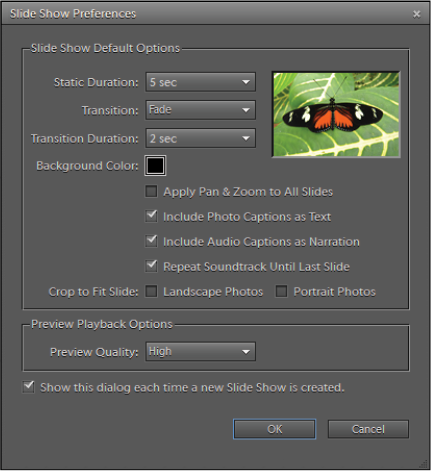
5 Press OK in the Slide Show Preferences dialog box that appears, accepting the default settings. The default settings allow you to create a slide show where each image is displayed for five seconds, and a two-second fade transition is applied between each picture. You may have to wait a couple seconds for the Slide Show Editor to open.
| You can use the Slide Show Preferences dialog box to define the parameters of the overall slide show—for example, how long each slide is visible, what type of transition you would like between the slides, and how the soundtrack behaves. All these settings are also editable individually from inside the Slide Show Editor. |
|
The settings in the Slide Show Preferences dialog box control the overall behavior of the slide show. |
Understanding slide show preferences
When you create a slide show, you can set the default behavior of the show. Each of these settings can be adjusted on an individual level in the Slide Show Editor after the slide show has been created.
Static Duration: This drop-down menu determines how long each individual slide displays. You can choose a value from the menu or type in the duration you want for each slide. Individual slide durations can be adjusted later.
Transition: Sets the default transition to apply between each slide. You can pick any transition you like from the menu. Apply no transition by setting the drop-down menu to none, or set the slide show to use a random transition.
Transition Duration: Sets the duration of each transition in your slide show.
Background Color: Sets the background color for each slide.
Apply Pan & Zoom to All Slides: Applies an automatic pan and zoom to every slide. The start and end points for the pan and zoom can be manually adjusted later. See the “Panning and zooming” section later in this lesson for more details.
Include Photo Captions as Text: Captions can be added to each image in the Organizer; this checkbox automatically converts those captions into slide text.
Include Audio Captions as Narration: If you have a microphone attached to your computer, then you can add audio captions to images in the Organizer.
Repeat Soundtrack Until Last Slide: Has little effect when the slide show is created, but once a sound track is added, it is automatically set to repeat.
Crop to Fit Slide: Crops the image so that it fits into the available slide area. You can choose to crop landscape images, portrait images, both, or neither. With this option disabled, images are scaled proportionally to fit inside the slide.
Preview Quality: Sets the quality that the slide show previews at in the Slide Show Editor.
6 Once the Slide Show Editor opens, press the Play button to preview the slide show. Each slide displays for a few seconds and then gradually fades into the next slide in the storyboard. This is because you left the preferences set to the defaults of a five-second hold with a two-second fade transition. You will edit these settings later in this lesson.
7 Stop the slide show from playing by pressing the pause button, then press the Save Project button from the upper-left corner of the Slide Show Editor. Name your project air show and press Save. The project is automatically saved to the Organizer. The Save dialog box informs you that the project will be saved to the Organizer with the current day’s date.
Adding text to your slide show
Your slide show is not limited to images. You can use the Photoshop Elements text tools to add both titles and captions to your work. The Text tool is accessible from the “Extras” menu in the Panel Bin on the right side of the Slideshow window.
1 Click the first slide in the storyboard to make it visible in your work area. You may have to scroll to the left to see it, depending on where you stopped the slide show.
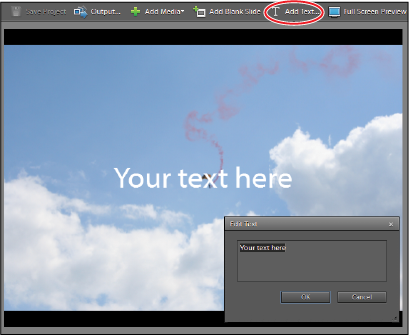
2 From the top of the Slideshow window, press the Add Text button. A text box with some generic text is added to the selected slide.
|
The Add Text button creates a text box and fills it with generic placeholder text. |
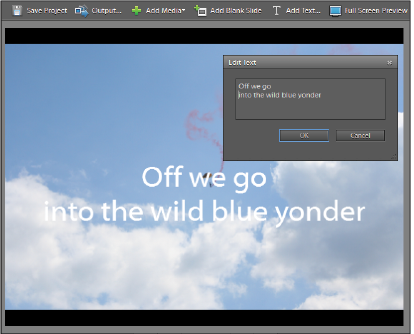
3 In the Edit Text dialog box, type Off we go into the wild blue yonder, inserting a return after the word go to split the text into two lines. Press OK.
|
The Edit Text dialog box allows you to change the text you have created. |
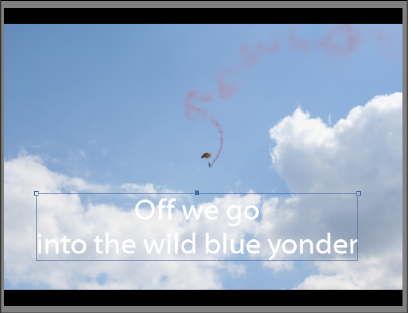
4 Place your cursor over the text box; the cursor becomes a hand ( ). Reposition the text by clicking and dragging while the cursor is over the text box. Move it to the bottom of the slide, so it sits over the clouds.
|
Reposition the text to the bottom of the slide. |
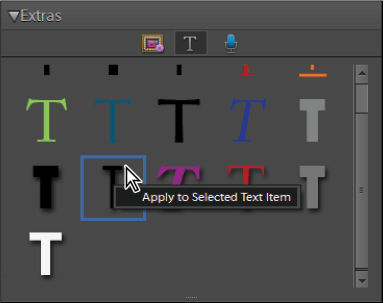
5 With the text frame highlighted, click the Click to add formatted text to your slide show button ( ) in the Extras panel. Right-click on the thin, black text in the second-to-last row and choose Apply to Selected Text Item.
|
Apply to Selected Text Item is the only option that appears when you right-click on a text style. |
| From the Text Properties panel, located below the Extras panel, you can change the font, size, color, opacity, alignment, and style of the text. The panel is contextual, which means that it changes, depending on the type of object you have selected. When text is selected, you have access to the properties that control the text frame. When an image is selected, you see the properties for editing the image. |
Continue to the next Photoshop Elements Tutorial: Adding graphics in Photoshop Elements >