Photoshop Elements Tutorial: Photoshop Elements for Artists
What you’ll learn in this Photoshop Elements Tutorial:
|
This tutorial provides you with a foundation for working with brushes in Adobe Photoshop Elements. It is the twelfth lesson in the Adobe Photoshop Elements 10 Digital Classroom book. |
Photoshop Elements Tutorial: Photoshop Elements for Artists
While Photoshop Elements is usually used for working with digital photographs. Artists and crafters use Photoshop Elements to create scrapbooking, custom birthday cards, or invitations.
Starting up
Within the Photoshop Elements Organizer: You will work with several files from the Lessons folder in this lesson. Make sure that you have downloaded the Lessons folder onto your hard–drive. In order to access these files in the Organizer, you need to import them. See “Adding files and folders to the Organizer” located in Lesson 1.
Within the Photoshop Elements Editor: The Photoshop Elements Editor defaults to the last panel layout that you used. Before starting, make sure your tools and panels are consistent with the examples presented in these lessons by resetting the panels. Do this by choosing Window > Reset Panels or by pressing the Reset panels button ( ) in the Options bar.
Creating a new document from scratch
In addition to opening and editing photos in Photoshop Elements, you can also create new documents from scratch. This is helpful when you want to create a photo collage, as you will do in this lesson. In the first set of exercises, you will create a collage using brushes, gradients, shapes, and patterns.
1 In the Photoshop Elements Editor, select File > New > Blank File to create a new document.
|
The New dialog box. |
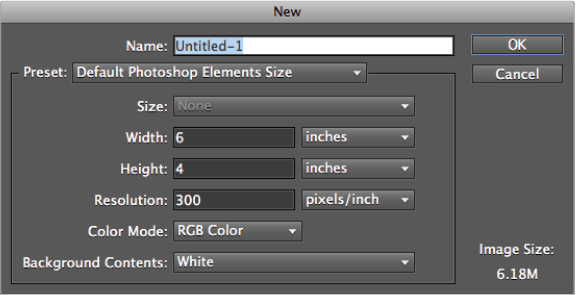
2 In the New dialog box, name the new file Happy Birthday.
3 Choose U.S. Paper from the Preset drop-down menu. This sets the size and resolution options to produce a high-quality printable image.
4 In the Size drop-down menu select Letter. Letter is the standard printer paper size, with a width of 8.5 inches and a height of 11 inches.
5 In the Resolution field, change the default of 300 ppi to 150 ppi. While 300 is the default for all high-quality projects sent to a print shop, a resolution of 150 is usually more than satisfactory for home inkjet printers. Leave the other two options, Color Mode and Background Contents, as you find them, and press OK.
6 Choose Window > Project Bin to collapse the Project Bin leaving more room for the document window. Choose View > Fit on Screen to expand the document window to full size.
7 Choose File > Save As. Navigate to the Lessons folder that you copied from the DVD. Leave all the settings at their defaults and press Save. Don’t close the file.
Using brushes to add style to your work
The first thing you are going to do is to use brushes to add some texture to the background of your canvas. Brushes in Photoshop Elements are used to apply color to your artwork. They actually function a lot more like stamps than brushes in the traditional sense, as each is actually a tip shape that you can paint with. In this exercise, you will be using brushes and gradients to create a background.
Creating texture with brushes and gradients
1 Click on the Brush tool ( ) in the Toolbox to the left of the program interface. At the top of the interface in the Options bar, click the brush stroke drop-down menu to show the Selected Brush Preset; it lets you select the brush tip you want to use.
|
The Options bar across the top of your screen allows you to set options for your active tool. |

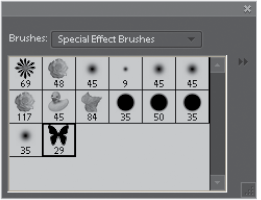
2 From the Brushes drop-down menu at the top left of the Options bar, select Special Effect Brushes and click on the Butterfly brush, also labeled as brush 29. Type 300px into the Size text field to the right of the Brush preset menu. Change the opacity to 50 percent by clicking on the opacity controls and dragging the slider that pops up, or type 50 into the opacity percent text field.
|
The brush presets menu allows you to select the brush tip you want to use. |
3 Create a new layer by clicking on the Create a New Layer button ( ) at the bottom-left corner of the Layers panel. Double-click on the words Layer 1, and change the name of the layer to Butterflies, and then press Enter.
 | The Create a New Layer button looks like a dog-eared piece of paper. The keyboard command for creating a new layer is Shift+Ctrl+N (Windows) or Shift+Command+N (Mac OS). |
4 Make sure that your cursor is not flashing in any of the option fields at the top. If it is, press the Enter key to commit the value. Press D on the keyboard to reset the foreground and background colors to the default black and white. Using your butterfly paintbrush cursor, click and drag across the canvas from the lower-left corner to the upper-right corner.
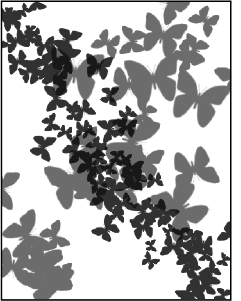
5 Type 150 px in the Size text field and change the opacity value to 75 percent. Again, click and drag across the canvas, but this time, start in the upper-left corner and drag to the lower-right corner. You should end up with something that looks like the following figure.
|
Your results should be similar to this image. |
6 Again, create a new layer by clicking on the Create a New Layer button at the bottom-left corner of the Layers panel. Double-click on the words Layer 1, and change the name of the layer to Gradient.
7 Choose the Gradient tool () in the Toolbox. A default black-to-white gradient loads into the gradient field. Click the gradient icon in the Options bar to open the Gradient Editor.
|
The active gradient displays on the left side of your tool options. Click on it to open the Gradient Editor. |

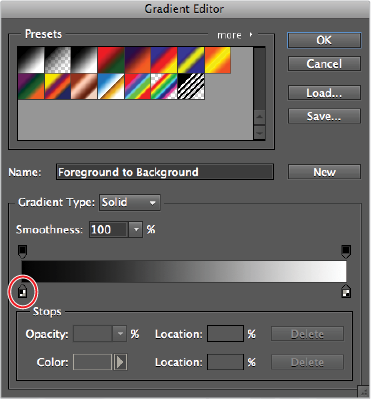
8 The top of the Gradient Editor displays a library of gradients that ship with the program. The bottom of the panel allows you to edit an existing gradient or to create a new one. Click on the left color stop at the bottom of the gradient bar; its options load into the Stops section at the bottom. Click the Color swatch to open the Adobe Color Picker.
|
Change the settings in the Gradient Editor. |
9 In the Color Picker, type the RGB values, R:29, G:29, B:229, to pick a bright-blue color. Press OK to exit the Color Picker.
|
The Photoshop Elements Color Picker is an Adobe standard and can be found in most of their applications. |
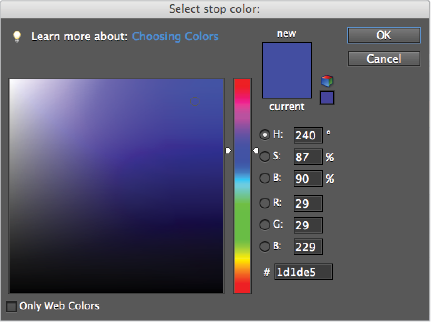
10 Click on the color stop on the bottom right, and then click the Color swatch picker to launch the Color Picker again. This time, set the RGB values to R:229, G:29, B:29, and press OK to exit the Select stop color box, and press OK to exit the Gradient Editor.
11 With the new Gradient layer highlighted, click in the upper-left corner of the page and drag your cursor towards the lower right corner. This applies a gradient that covers the entire canvas.
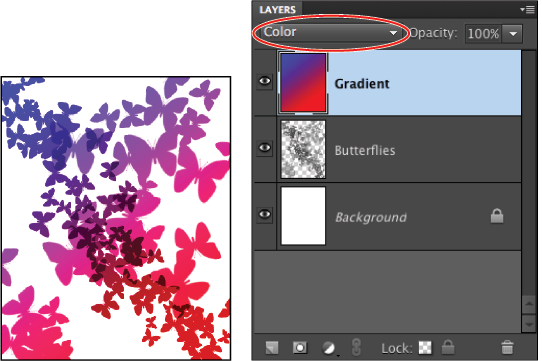
12 In the Layers panel, click the Layer blending mode drop-down menu and select Color. This allows the Gradient layer to tint the Butterflies layer beneath it.
|
Change the blending mode to change the effect on the image. |
13 Choose File > Save to save your work. If the Save As dialog box appears, click to deselect the option for Save in Version Set with Original, click the name of your previous file, Happy Birthday, then press Save to overwrite it. Do not close the file.
Fun with brushes
Brushes in Photoshop Elements have many options that allow you to create a variety of visual effects. You can set a brush’s dynamic options by selecting the Brush tool, selecting the brush tip you want to work with, then opening the More Options menu ( ) in the Options bar.
Fade: Sets the number of steps it takes the paint flow to fade out. The lower the value for Fade, the more quickly the fade-out effect is.
Hue Jitter: Sets the rate at which the brush color switches between the foreground and background colors.
Scatter: Controls how close to the edge of a path brush marks are distributed. Low numbers keep the marks tightly together, while higher numbers allow for a wider distribution.
Spacing: Controls the distance between each mark the brush tip makes as you drag it.
Hardness: Controls the hard edge of the brush. Higher values give the brush a hard, solid edge, while lower values soften the edge. This setting isn’t available for some brushes.
Angle: Sets the rotation value for the brush tip.
Roundness: Tilts the angle of the brush tip away from the viewer. This results in a brush that appears to flatten out at lower numbers.
Creating custom brushes
Brushes can be created from any selection.
1 Simply create a selection using any Selection tool. Select Edit > Define Brush.
2 In the Brush Name dialog box, name your new brush and press OK. It now becomes accessible from the brush menu in the Options bar.
| Anything that you can select can be defined as a brush: a part of a photograph, a drawing, a scan, a bunch of scribbled lines, anything. The important thing to remember is that if a brush is solid black or solid white, then the white areas will be transparent and the black areas will be visible when you paint with it. If the artwork from which you make the brush uses gray or any color, then the brush will paint colors that are semi-transparent. |
The Impressionist brush
Impressionism was an artistic movement in the early nineteenth century. It was characterized by bold brush strokes and vibrant colors. The Impressionist brush in Photoshop Elements has the ability to simulate the appearance of this art style and can be used to spice up a design. It does this by warping the areas of an image to resemble the strokes of a paint brush. In this exercise, you will merge a flower image into the Happy Birthday file and create an impressionist version of the flowers.
1 With the Happy Birthday file still open, choose File > Open. Navigate to the Lessons folder and select the Flowers.tif file. Double-click the file to open it.
2 Open the Project Bin choosing Window > Project Bin. Activate the Magic Wand tool ( ) in the Toolbox, and click the white area of the image. A selection border should appear that completely encloses the white area of the image.
3 Choose Select > Inverse to reverse the selection so that the flowers become selected. Activate the Move tool ( ) by clicking on it in the Toolbox.
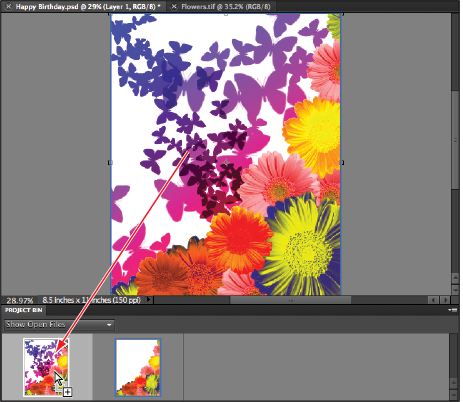
4 Click on the flowers with the Move tool and drag them into the thumbnail of the Happy Birthday image in the Project Bin. This copies the flowers into the image. If necessary, reposition the layer so the flowers appear in the lower right. If you hold down the Shift key on your keyboard while dragging the selection onto the thumbnail in the Project bin, it will center the image when it is copied to the new file.
|
You can drag from the document window to the Project Bin to move content between files. |
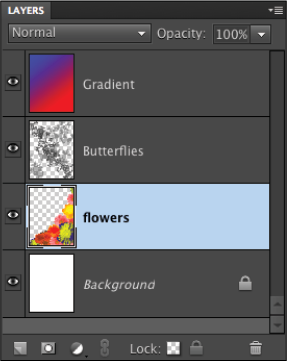
5 In the Layers panel of the Happy Birthday image, the flowers show up as a new layer. If it is not already there, click and drag this new layer below the Butterflies layer. This places it right above the Background layer. Double-click on the name of the layer and rename it flowers.
|
Layer positioning, called stacking order, can be changed by dragging and dropping layers. |
6 Click and hold on the Brush tool ( ) and choose the Impressionist Brush tool (
 ) from the list of options. In the Options bar, type 25 in the Size text field, just as you did when working with the regular brush. In the Layers panel, click the visibility icons (
 ) for the Butterflies and Gradient layers to turn them off. This allows you to see the flowers layer all by itself.
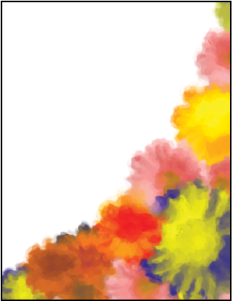
7 Click on the flowers layer once again to make sure that it is the active layer. Click and drag with the Impressionist brush all over the flowers in the document window. You should notice that the photograph begins to look more like a painting. Continue to click and drag all over the flowers until you end up with an image that looks like a painting.
|
For an interesting effect, you can try holding the brush still in one location for a while instead of dragging it. |
8 Click the visibility icons back on for the Butterflies and Gradient layers to see the effect. The flowers are now tinted by the gradient and create an interesting background texture for the design.
9 Choose File > Save to save your file.
Continue to the next Photoshop Elements Tutorial: Using shapes creatively in Photoshop Elements >