Photoshop tutorial: Using Camera Raw as a filter in Photoshop
What you’ll learn in this Photoshop Tutorial:
|
This tutorial provides you with a foundation for working with Adobe Photoshop Camera Raw. It is the fourteenth lesson in the Adobe Photoshop CC Digital Classroom book. For more Adobe Photoshop training options, visit AGI’s Photoshop Classes. |
Adobe Photoshop Tutorial: Using Camera Raw as a filter in Photoshop
Previous versions of Photoshop included the Camera Raw component; now, Photoshop has added the Camera Raw filter in Photoshop CC. This filter allows you to access many of the helpful correction tools that were previously available only in the Camera Plug-in. Using the Camera Raw filter, you have many of the same options as the plug-in, though some have been removed because they don’t apply to the filter workflow. The features that are removed from the Camera Raw Filter dialog box are Rotate, Crop, Save, Lens, and Camera profile to name a few. In this part of the lesson, you’ll try out the filter to make two simple corrections. For more details about working in the Camera Raw, see Lesson 6, “Color Correcting an Image.”
1 With ps1401_work.psd still open, select the Camera layer and then choose Filter > Convert for Smart Filters. This turns this layer into a Smart Object, thus allowing you to edit it again for a future use. For more details about Smart Objects, see Lesson 12, “Using Smart Objects in Photoshop.”
If a dialog box appears informing you that to enable re-editable smart filters the selected object with be converted to a Smart Object, click OK.
The Camera layer is a low-quality image that you will use to try out some of the new tools in Photoshop CC.
2 Choose Filter > Camera Raw Filter. The Camera Raw dialog box appears. In this dialog box, you will adjust two items: the white point to balance the color, and the exposure to lighten the image a bit.
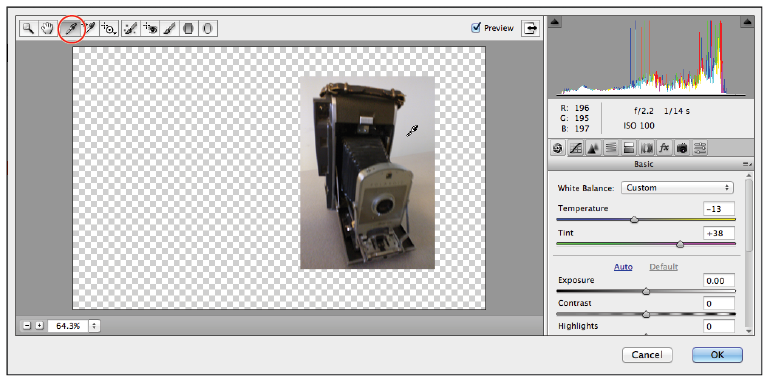
3 Select the White Balance tool ( ) from the toolbar at the top of the Camera Raw dialog box. The White balance tool can be used to click an area in the image that is a shade of grey. By locating a grey or a neutral shade and clicking it with the White Balance tool, you can eliminate casts in the image relatively easy. Keep in mind that this is a quick correction technique; if you need more control, use the Curves panel.
4 With the White Balance tool selected, click the wall behind the camera. The yellowish-orange cast caused by the incandescent lighting is removed. You will now increase the exposure using the Radial filter.
|
Select the White balance tool and click the wall to remove the color cast. |
5 Select the Radial filter tool ( ), press and hold Control+Shift (Windows) or Command+Shift (Mac OS), and then drag from the center of the lens of the camera until the edge of the radius reaches the right side of the image. By holding the Control/Command and Shift key, you can make a perfect circular radial filter selection from a center point. The Radial Filter acts as a vignette (or feathered) selection technique in the Camera Raw filter.
|
Make a selection in the image with the Radial Filter. |
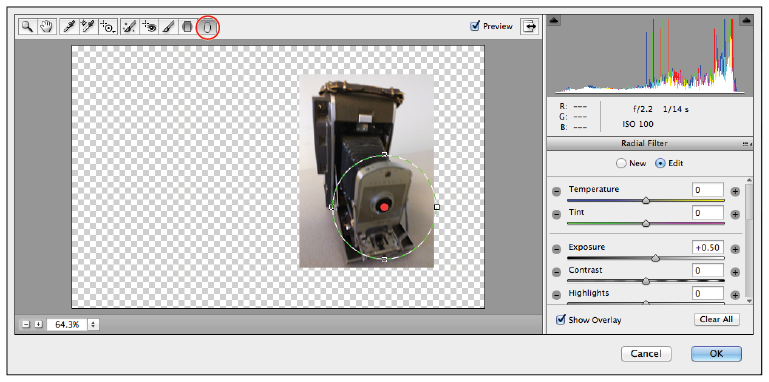
When the Radial Filter is selected, the options on the right change to reflect adjustments that you can make. Changes that you make in the Camera filter are dynamic and easily changed while you are still in this dialog box.
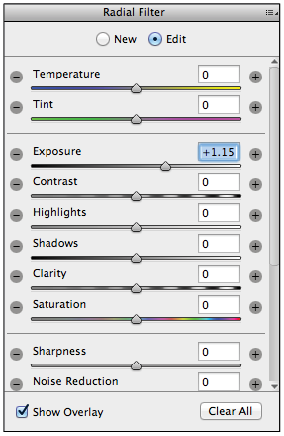
6 Click and drag the Exposure slider to the right until it reaches about +1.15, or type 1.15 into the Exposure text field. Notice that the outside of the selection is affected.
|
Increase the exposure slightly. |
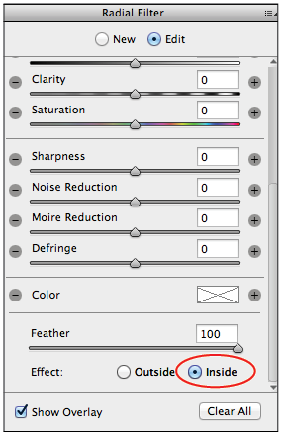
7 Scroll to the bottom of these options to change the results to affect the inside of the selection. Do this by selecting the Inside in the Effect section. This is also where you can change the amount of feathering. For this lesson, keep the feathering at 100.
|
Change the exposure to affect the inside of the |
8 Now that you have made an adjustment, experiment with changing the Radial Filter selection. Make it larger or smaller; change it from a circle to an oblong shape. Work with the filter until you think it improves the exposure in the center part of the camera. No exact settings are necessary for this lesson.
9 Click OK, and choose File > Save. Keep this file open for the next part of this lesson.
Shake Reduction
In this part of the lesson, you’ll try out the new Shake Reduction Filter, which is helpful when trying to reduce the effects of camera shake. It works best with images that have the following characteristics:
- Still camera captures
- Low noise or graininess
- Relatively good lighting (not too dark or light)
- Indoor images taken at a slow speed with no flash
- Images captured with long focal length shot both indoor and outdoor
- Forensics; great to use to improve the quality of text in an image
About Shake Reduction
Shake reduction is an incredible new feature available as a filter in Photoshop CC, but while it’s a great tool, it does not solve all blurry image problems. Keep the following in mind when selecting images to use with this filter:
- The Shake Reduction filter does not work well with images that have specular highlights. (As discussed in Lesson 6, “Color Correcting an Image,” specular highlights are very bright spots caused by shiny material and reflections of light.)
- The Shake reduction will not drastically improve a moving object in your image.
- It is best to use in a portion of your image, rather than apply the filter to the entire image.
1 With the ps1401_work.psd image still open, and the Camera layer still active, choose Filter > Sharpen > Shake Reduction. The Shake Reduction dialog box appears.
As soon as the Shake Reduction dialog box opens, the Shake Reduction filter auto-detects a problem area and begins to analyze the shape, size, and shake (motion) of the area. It then determines the best way to address motion, starting from the center of the selected area and moving out.
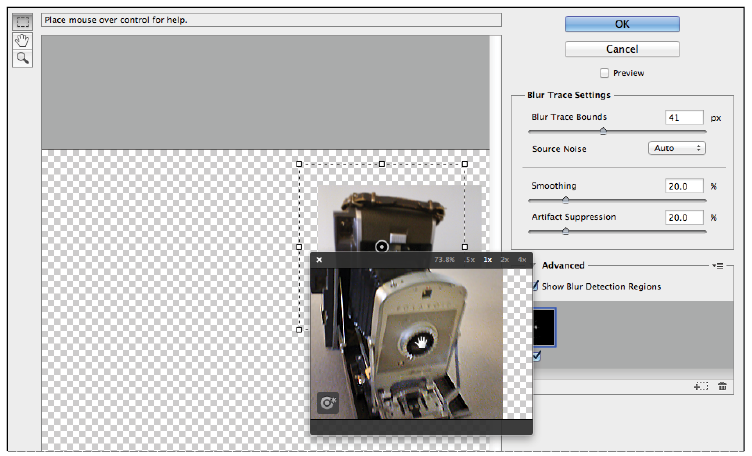
2 Double-click the center of the camera lens in the image to open the a detail Loupe view right above the area you clicked. Once you open the Loupe view, you can zoom in to enhance the shake reduction in that view (which is referred to as the loupe location).
Click and hold in the Detail view to turn off the preview; release to show the preview again. You can also press Q to dock and undock the Detail view. |
|
You can enhance just the Loupe view, or use it to zoom in and out of the area. |
The shake reduction feature determines and makes automatic adjustments, but you have the ability to tweak them yourself using the Blur Trace Settings area in the Shake Reduction dialog box.
Here are the settings and what each affects:
- Blur Trace Bounds: Photoshop automatically figures out the amount of movement in pixels. You can manually adjust that amount when necessary.
- Source Noise: You can use this drop-down menu to manually override automatic source image noise detection.
- Smoothing: You can use the slider to manually adjust for smaller artifacts that occur with sharpening.
- Artifact Suppression: Larger halo like artifacts can be adjusted with this slider.
3 If your loupe preview is open, press Q or the “X” in the upper-left corner of the loupe window to re-dock it.
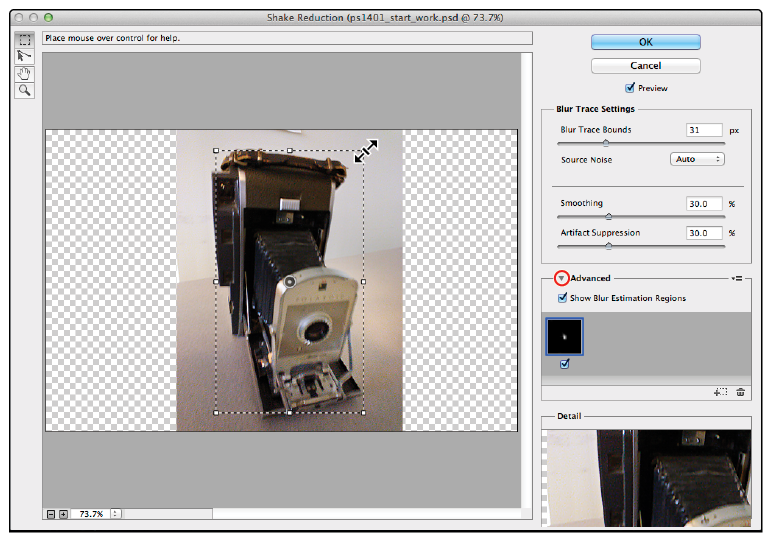
4 Turn the arrow down to the left of Advanced to see the Advanced section and also a selection area on top of the preview.
5 Use the handles on the selected area to center it on the front to the camera.
|
Select the Advanced section to create a selection. |
6 You can experiment with the sliders and settings to see the effect they have on the preview. Don’t worry about ruining the image; you will reset it in the next step.
7 Press and hold the Alt (Windows) or Option (Mac OS) key; note that OK changes into Reset. Click Reset; you are now at the original default settings.
8 You may have to drag your selection area to re-center it over the lens. Click OK.
9 Choose File > Save, and keep this file open for the next part of the lesson.
Finishing the image composition
You will now put your camera image into the image area of the instant camera border.
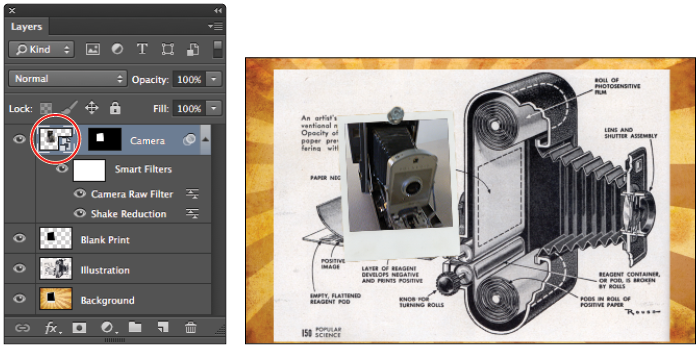
1 Turn off the visibility of the Camera layer so you can see the entire Blank Print layer by clicking the visibility icon ( ).
2 Click the Blank Print layer in the Layers panel to make sure it is the active layer.
3 Select the Magic Wand tool ( ); it is the hidden tool for the Quick Selection tool (
 ).
).
4 Using the Magic Wand tool, click in the center of the black area of the blank print. The black area is active.
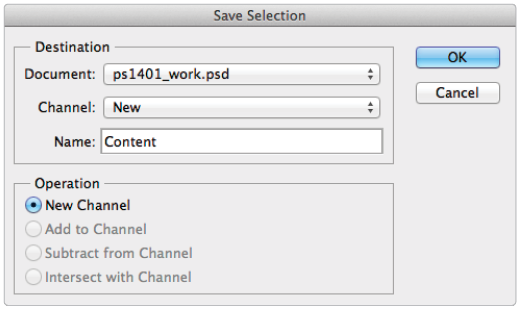
5 Save this selection for later use. Choose Select > Save Selection. In the Save Selection dialog box, type Content into the Name text field, and then click OK, leaving all the other settings at the defaults.
|
Create a selection for the print area and save it. |
6 Choose Select > Deselect, or press Control+D (Windows) or Command+D (Mac OS).
7 Choose File > Save. Keep this file open for the next part of this lesson.
Putting the image into the print frame
In this next section, you will insert the image of the camera that you worked on into the picture frame. To do this, you will reselect your saved Content selection and apply it to your Print layer.
1 With the ps1401_work file still open, click the Camera layer to activate it.
2 Click the visibility icon ( ) to turn the visibility of the Camera layer back on.
3 Select the Move tool ( ) and reposition the image of the camera so it is on top of the blank photo frame.
4 Press Control+T (Windows) or Command+T (Mac OS) to transform this image. You might receive an error message alerting you to the fact that Smart filers will be temporarily disabled while you are transforming this layer; click OK.
Since the Smart Filters are disabled, your image might look different. This is fine; the image corrections you made earlier will return after you complete the resize and rotation of the image in the following steps. |
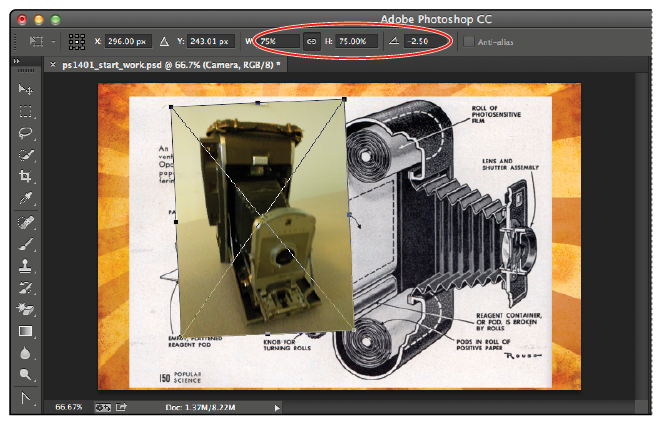
5 Using the Transformation handles, press and hold the Shift key and click and drag inward any of the corners to make the camera image smaller. In our example, the image was scaled down to about 75%. You can also type 75 in the Width text field, and then click the Maintain aspect ratio chain icon ( ) in the Options bar.
You can see the scale percentage in the Options bar at the top of the workspace. |
6 Position the cursor outside the lower-right corner transformation handle and click and drag upwards towards the right; this rotates the layer content. In this example, the content was rotated about -2.5 degrees. You can also type -2.5 in the Rotate text field in the Options bar. Select the Confirm check mark ( ) in the Options bar when you are finished transforming this layer.
You will most likely receive a Shake Reduction warning indicating that the current image size is different than the one you estimated with using the Shake Reduction filter. Click Yes to reset the blur trace for the present size.
|
Transform the camera image so that it will fit in the blank picture frame. |
7 With the Camera layer still active, choose Select > Load Selection to reload your selection; choose the Content selection. The selection is now active.
8 Stay on the Camera layer, and then click the Add layer mask button ( ) at the bottom of the Layers panel. The camera image is now inside the selection.
9 If you need to reposition the camera image inside the layer mask, unchain the mask from the camera image by clicking the chain icon ( ) between the mask and the camera image in the Layers panel.
10 Click the Camera thumbnail (left of the mask) to activate only the camera image, not the mask, and then use the Move tool to reposition the image inside the mask.
|
Unchain the mask from the camera The image is cropped in the frame. |
11 Choose File > Save; keep this file open for the next part of the lesson.
Changing the Blending mode
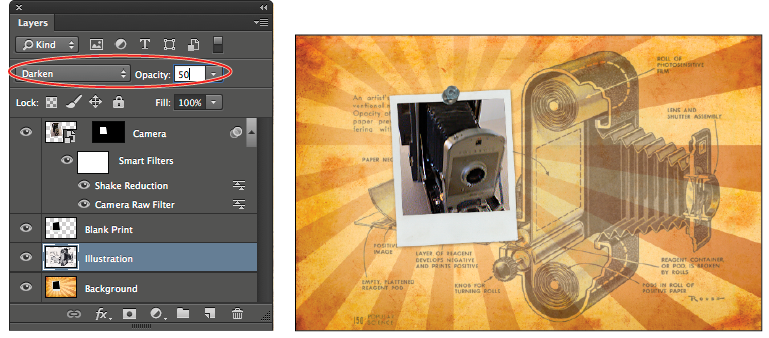
Next you will perform the final step: changing the blending mode of the Illustration layer.
1 Select the Illustration layer.
2 From the Set the blending mode drop-down menu, choose Darken. Now only the parts of the Illustration layer that are darker than the underlying image appear.
3 Use the Opacity slider and drag to the left to about 50% or type 50 into the Opacity text field.
|
Make adjustment to the Illustration layer. The final lesson file. |
4 Choose File > Save and then File > Close to close this file.
Continue to the next Photoshop Tutorial: Live Shape properties in Photoshop >