Photoshop Elements Tutorial: Using Undo History for comparisons in Photoshop Elements
What you’ll learn in this Photoshop Elements Tutorial:
|
This tutorial provides you with a foundation for working with multiple files in Adobe Photoshop Elements. It is the eleventh lesson in the Adobe Photoshop Elements 10 Digital Classroom book. |
Photoshop Elements Tutorial: Using Undo History for comparisons in Photoshop Elements
The Undo History panel in Adobe Photoshop Elements can be used for a wide variety of functions. In this exercise, you will use it to compare the image before the Unsharp Mask filter was applied to the finished file.
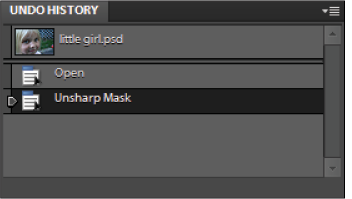
1 Open the Undo History panel by choosing Window > Undo History. This panel keeps track of the last 50 actions that you have performed while the current file was open.
|
The Undo History panel records the last 50 actions performed by default. |
 | The Undo History for a file is restarted every time the file is opened. The number of history states can be set in the Performance section of the Photoshop Elements preferences and is accessible by going to Edit > Preferences > Performance. |
2 The thumbnail at the top of the Undo History panel is called a snap shot. Click the snap shot to see how your image looked when it was first opened.
3 Click the history state named Unsharp Mask to see the effects of the Unsharp Mask filter.
| Make sure that when you finish comparing your images, you finish with Unsharp Mask highlighted. |
4 Choose File > Save or press Ctrl+S (Windows) or Command+S (Mac OS) to save the file, and then close the file.
Using the Blur filter to create depth of field
A depth-of-field effect is intended to help establish the illusion of depth in a flat photograph. Depth of field occurs when objects appear more (or less) blurry, based on their positioning from the camera lens. Depth of field is generally created by factors such as aperture, lens focal length, and distance from the subject being photographed. Due to other factors, you may not be able to capture the desired depth-of-field at the time the picture is taken. Because of this, depth-of-field effects are often achieved after the image has been transferred to the computer.
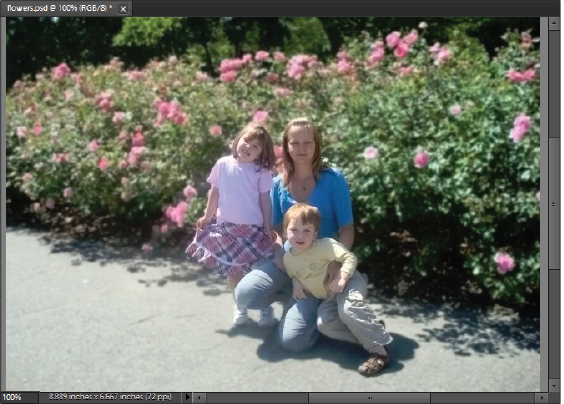
1 In the Organizer, type flowers into the search text field. This isolates every image that has flowers in the title. Right-click the flowers.psd image and choose Edit with Photoshop Elements from the contextual menu that appears. This file has been built with two saved selections that define the foreground and background of the image to make it easier to apply the filters that will create the depth-of-field effect.
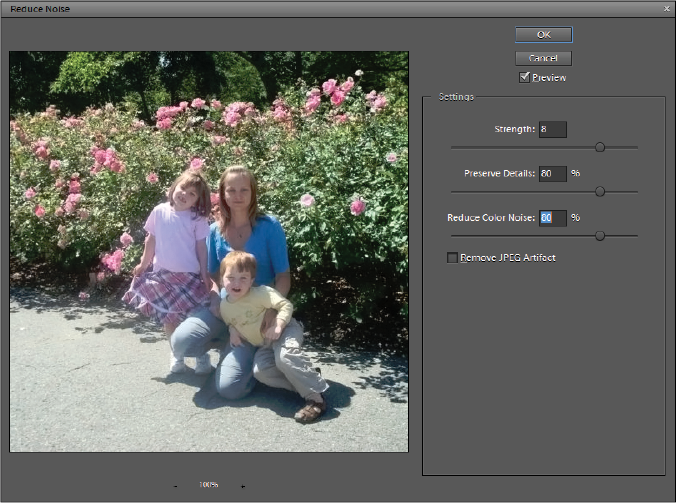
2 In the Editor, the first thing you are going to do is remove the graininess that appears in the image. Choose View > Actual Pixels to view your image at 100 percent zoom, then choose Filter > Noise > Reduce Noise.
The Reduce Noise filter reduces both white and color noise in an image. Additionally, you can remove noise when a JPEG file is created. You can also select the Remove JPEG Artifacts option in the dialog box to remove the blocky artifacts and halos that are caused by saving an image at a low JPEG quality setting, but that is not needed here.
3 Type 8 in the Strength text field, 80 in the Preserve Details text field, and 80 in the Reduce Color Noise text field. Press OK.
|
The Remove Noise dialog box. |
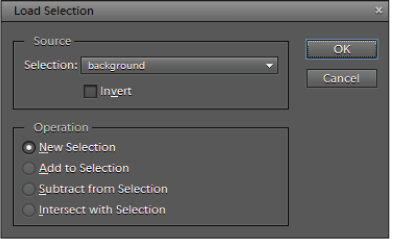
4 Choose Select > Load Selection. In the Load Selection dialog box, choose background from the Selection drop-down menu in the Source area. Confirm that Operation is set to New Selection and press OK.
While you could create the selection on your own using the selection tools, as you discovered in Lesson 5, “Adjusting Color,” here the selection was saved for you so you can focus on creating the depth of field effect.
|
The Load Selection dialog box allows you to load a selection that was previously saved using Select > Save Selection. |
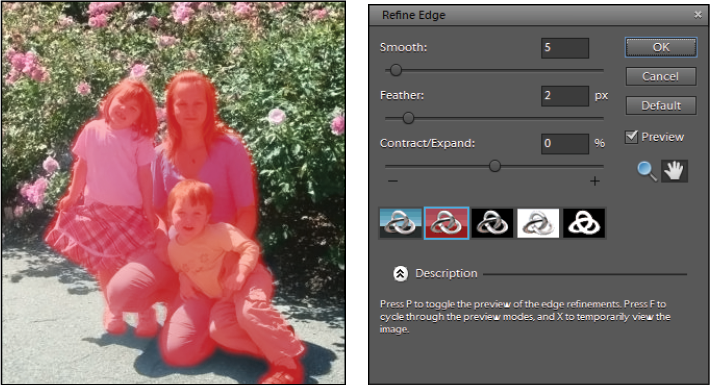
5 Choose Select > Refine Edge to open the Refine Edge dialog box. Type 5 in the Smooth text field and 2 in the Feather text field, and then press OK.
|
You can preview the Refine Edge command against a custom color to make it easier to see the effect of the feather setting. |
Press Ctrl+H (Windows) or Command+H (Mac OS) on the keyboard to temporarily hide the selection edges but keep the area selected. This makes it easier to judge the effect of the filter you will apply next.
6 Choose Filter > Blur > Gaussian Blur. Drag the slider to see the effect of various radius settings before typing 1 in the Radius text field and press OK.
|
Thanks to the selection, the background is blurry, and everything else is unaffected. |
Press Ctrl+H (Windows) or Command+H (Mac OS) on the keyboard again to make the selection edges visible. It is important to remember to turn the selection edges back on whenever you do not need them to be invisible; otherwise, you may forget that you have something selected.
9 Choose File > Save or press Ctrl+S (Windows) or Command+S (Mac OS) on the keyboard to save the file.
Congratulations, you have finished this lesson.